
Quarkus with React frontend secured with Keycloak
I remember those days when I was working as fully frontend developer, feeling really confident in CSS, JS, HTML, jQuery… I’m aware of that it sounds really old nowadays! As backend developer, I always kept an eye in how the frontend frameworks evolved: Angular, React, Vue.js… Also I played a bit with Angular 2.x and 4.x, and indeed I quite enjoy it a lot. Now, let’s do something with React!
To be honest, I don’t really like the React development model with components modelling, that’s why I always preferred Angular. However, React is quite well integrated with Quarkus and wanted to demostrate how to secure these apps using Keycloak.
Requirements:
1.- Create Quarkus application
Let’s create our Quarkus application using the OIDC extension in order to secure our application and resteasy-jsonb extension to marshall our endpoints with JSON.
mvn io.quarkus:quarkus-maven-plugin:2.16.2.Final:create \
     -DprojectGroupId=org.sgitario.quarkus \
     -DprojectArtifactId=quarkus-react \
     -DclassName="org.sgitario.quarkus.GreetingResource" \
     -Dpath="/hello" \
     -Dextensions="oidc, resteasy-reactive-jsonb"
cd quarkus-react
Also, our application will have a REST endpoint with path “/hello”. But, before running our application, we need to configure our OIDC provider.
2.- Configure OIDC provider
We’ll be using a Keycloak instance with Docker:
docker run -e KEYCLOAK_USER=admin -e KEYCLOAK_PASSWORD=admin -p 8280:8080 jboss/keycloak
Then, we need to create the client and we’ll be using the default “admin” user and the role “create-realm”.
- Get the token:
> export TKN=$(curl -X POST http://localhost:8280/auth/realms/master/protocol/openid-connect/token \ -H "Content-Type: application/x-www-form-urlencoded" \ -d "username=admin" \ -d 'password=admin' \ -d 'grant_type=password' \ -d 'client_id=admin-cli' | jq -r '.access_token') - Create the client called “react-client”:
> curl -X POST http://localhost:8280/auth/admin/realms/master/clients \
 -H "authorization: Bearer $TKN" \
 -H "Content-Type: application/json" \
 --data \
 '{
    "id": "react-client",
    "name": "react-client",
    "redirectUris": ["*"],
    "publicClient": true
 }'
With Keycloak up and running and the client configured, we need to update the application.properties of our Quarkus application accordingly:
quarkus.oidc.application-type=web-app
quarkus.oidc.auth-server-url=http://localhost:8280/auth/realms/master
quarkus.oidc.client-id=react-client
quarkus.oidc.roles.source=accesstoken

quarkus.http.auth.permission.authenticated.paths=/*
quarkus.http.auth.permission.authenticated.policy=authenticated
| Note that this property “quarkus.oidc.roles.source” is set to “accesstoken”, so Quarkus gets the roles from Keycloak using the access token information. |
3.- Expose the users information
We’re going to create a new User resource in our Quarkus application:
@Path("/api/user")
public class UserResource {

    @Inject
    SecurityIdentity identity;

    @GET
    @Path("/me")
    @Produces(MediaType.APPLICATION_JSON)
    @NoCache
    public User me() {
        return new User(identity);
    }

    public static class User {

        private final String userName;
        private final Set<String> roles;

        User(SecurityIdentity identity) {
            this.userName = identity.getPrincipal().getName();
            this.roles = identity.getRoles();
        }

        public String getUserName() {
            return userName;
        }

        public Set<String> getRoles() {
			      return roles;
		    }
    }
}
Now, we can try our Quarkus application using:
mvn clean compile quarkus:dev
Then, when you browse to http://localhost:8080/api/user/me, you will be get redirected to login in Keycloak (remember the credentials are admin/admin), and then see the user data:
{"roles":["create-realm","offline_access","admin","uma_authorization"],"userName":"admin"}
4.- Create the React application
We’re going to create the React application using the npx npm plugin:
> mkdir src/main/webapp && cd src/main/webapp/
> npx create-react-app .
Next, we need to integrate the React webapp with Quarkus and Maven, so everytime we build our Quarkus application, the React webpage is packaged as well. For doing this, we can use the Quinoa Quarkus extension, let’s add it into our pom.xml file:
<dependency>
    <groupId>io.quarkiverse.quinoa</groupId>
    <artifactId>quarkus-quinoa</artifactId>
    <version><!-- use compatible version with your Quarkus version --></version>
</dependency>
And configure the webpage directory that we have used which is “src/main/webapp” with the Quinoa extension by adding this property:
quarkus.quinoa.ui-dir=src/main/webapp
Now, if we run again our Quarkus application and browse to http://localhost:8080/, we are redirected to Keycloak to authenticate ourselves and then we’ll see our React application.
5.- Configure React to get the logged user
What about if our React app want to expose some functionality depending on the user roles? We could expose a Quarkus endpoint “user/roles/XXX” that returns “true” if the logged user has the role “XXX”. Let’s do something similar, change the src/main/webapp/src/App.js with:
import React from 'react';
import logo from './logo.svg';
import './App.css';

function App() {

  const [userLogged, setUserLogged] = React.useState({});

  fetch('/api/user/me')
    .then(res => res.json())
	.then((data) => {
	  setUserLogged(data)
	})
	.catch(console.log);

  const getUserName = () => {
    return userLogged.userName;
  }

  const isAuthenticated = () => {
    return userLogged != null && userLogged.userName != null;
  }

  const hasRole = (roles) => {
    return userLogged != null && userLogged.roles != null && roles.some(role => userLogged.roles.includes(role));
  }

  return (
    <div className="App">
      <header className="App-header">
        <img src={logo} className="App-logo" alt="logo" />
        {!isAuthenticated() && <p><h2>You are not authenticated</h2></p>}
        {isAuthenticated() && <p>
          <h2>Hello {getUserName()}!</h2>
          {hasRole(['create-realm']) && <p>You have the Create Realm role, congratulations!</p>}
          {!hasRole(['create-realm']) && <p>You don't have the Create Realm role, sorry!</p>}
        </p>}
      </header>
    </div>
  );
}

export default App;
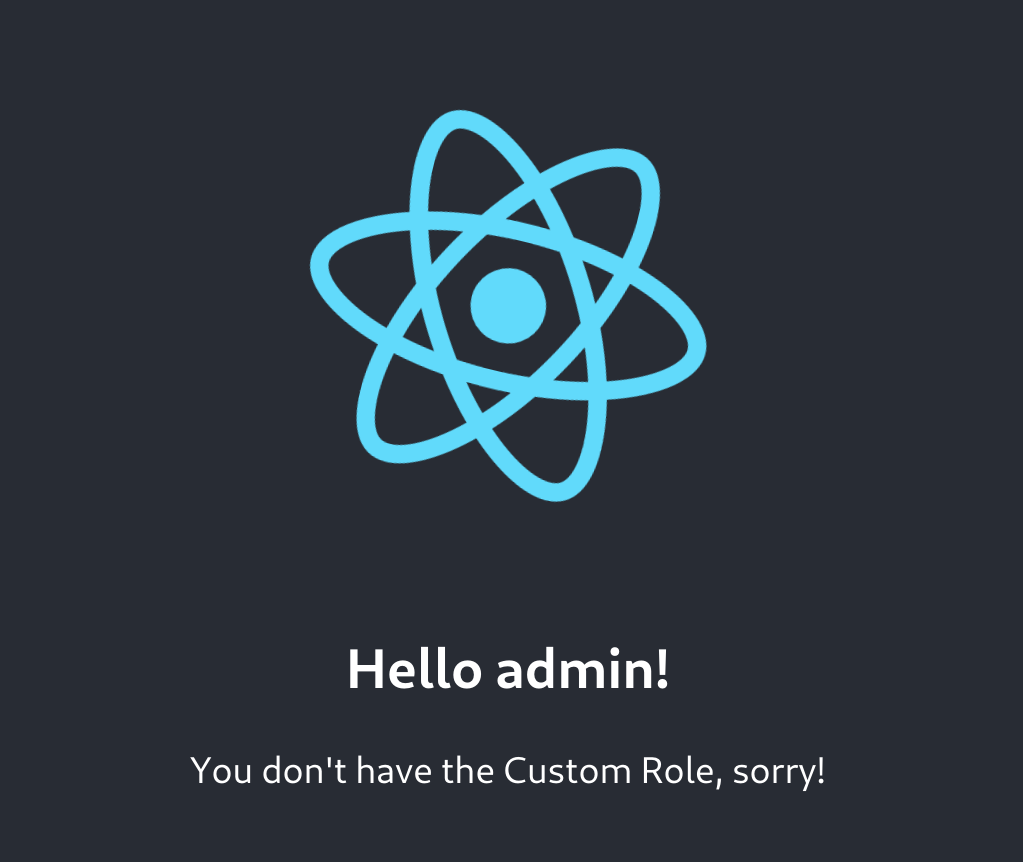
We’re using the endpoint “/api/user/me” to fetch the logged user from the Quarkus app and create some methods to check whether the user is logged and if the user has some roles.
Therefore, when running our application, we should see something like this:
Happy coding!
Conclusions
Source code can be found here.